guides
How to Grow Chives Indoors
Grow fresh chives indoors all year from bulbs or seeds. Step-by-step guide on light, soil, watering, and harvesting for common and garlic chives.
 Priya Anand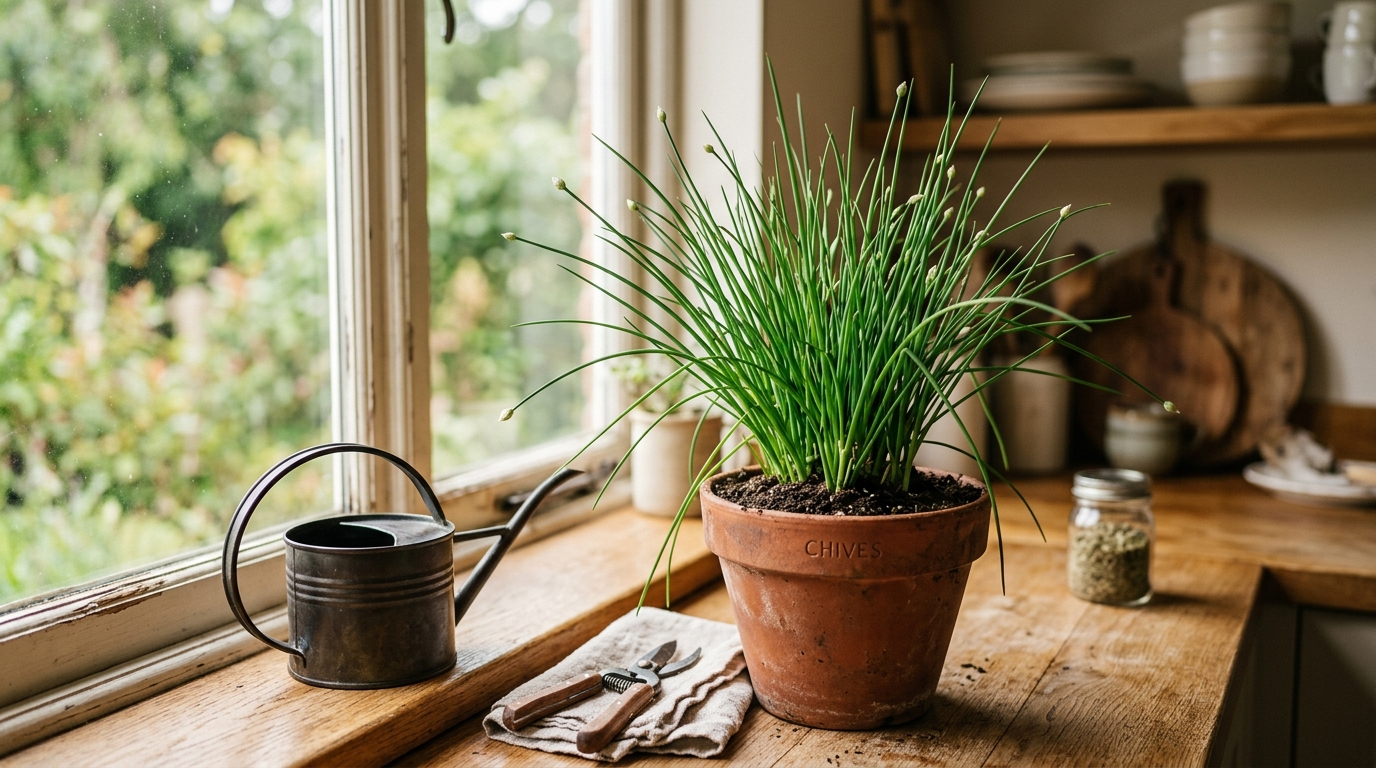
Chives grow best indoors in a 6–8 inch container with good drainage, placed in a bright window with 4–6 hours of direct sun or under a grow light running 12–14 hours daily. Common chives (Allium schoenoprasum) are the easiest variety to start — they tolerate lower light than basil, regrow quickly after each snip, and produce continuous harvests for months without bolting the way cilantro does.
Chives are genuinely one of the most productive indoor herbs relative to the attention they require. Once established in a 6-inch pot, a healthy clump produces enough for regular kitchen use within 3–4 weeks — and a single plant, divided and repotted every year, provides an essentially unlimited supply of fresh chives at zero additional cost. A grocery store bunch of chives costs $2–3 and wilts within a week. A $3–5 starter transplant returns that investment in the first month and keeps producing for years.
Is growing chives indoors worth it?
Chives are one of the easiest culinary herbs to grow indoors and among the most economical. Unlike basil, which requires high light and reseeding every few months, or cilantro, which bolts rapidly and requires continuous succession planting, chives are a perennial that stays productive for years in the same pot with minimal intervention.
The kitchen return is also high. Fresh chives appear in eggs, soups, baked potatoes, cream cheese, salads, and garnishes throughout the year. Grocery store chives deteriorate quickly after purchase — hollow leaves go limp within 3–5 days even refrigerated, and the mild onion flavor that makes them valuable fades noticeably. Snipping fresh from a living pot delivers peak flavor and aromatics that store-bought chives cannot match.
From a practical standpoint, chives are also forgiving of brief neglect. They tolerate occasional dry spells better than basil and bounce back from both underwatering and short cold snaps that would kill more tender herbs. If you are new to growing indoor herbs, chives are one of the best starting points.
What you need to grow chives indoors
| Product | Best for | Rating | Notes | |
|---|---|---|---|---|
| Terracotta herb pot 6-8 inch with drainage holes | Container chives — breathable walls regulate moisture and prevent rot | ★★★★★ | Terracotta dries faster than plastic, which suits chives well. A 6-inch pot handles a standard transplant for 10-14 months before division is needed; an 8-inch pot extends that to 18-24 months. | Check price |
| Well-draining herb potting mix with perlite | Even moisture retention without the root saturation that causes bulb rot | ★★★★★ | A standard potting mix blended with 20% perlite provides the drainage chives need. Avoid heavy garden soil or dense mixes — poorly drained soil is the most common cause of indoor chive failure. | Check price |
| Full-spectrum LED grow light for herbs | Growing chives without a south or east window, or through winter months | ★★★★★ | Run 12-14 hours daily positioned 6-10 inches above the chive clump. Chives tolerate lower light than most culinary herbs — a basic 20W LED strip is sufficient for one to three pots. | Check price |
| Outlet timer for grow light | Maintaining a consistent daily light cycle without manual switching | ★★★★★ | A basic plug-in timer costs $10-15 and pays for itself quickly. Consistent photoperiods produce steadier growth; irregular light schedules can trigger premature dormancy in shorter-day winter months. | Check price |
| Balanced liquid herb fertilizer | Sustaining continuous leaf production in a nutrient-limited container | ★★★★★ | A balanced 5-5-5 or 10-10-10 liquid fertilizer at half strength every 3-4 weeks keeps chives growing vigorously. Heavy nitrogen feeding produces lush but bland leaves with a diluted flavor. | Check price |
| Herb scissors with multiple blades | Harvesting chives cleanly without crushing the hollow stems | ★★★★★ | Multi-blade herb scissors cut several stems simultaneously and produce a cleaner cut than a knife on narrow hollow chive leaves. A clean cut at 2 inches above soil is the most important harvesting practice. | Check price |
Step 1: Choose your chive variety
Two varieties dominate indoor growing, and understanding the difference helps you match the plant to your cooking habits.
Common chives (Allium schoenoprasum) are the standard culinary chive — hollow, tubular leaves, 8–14 inches tall at maturity, with a mild onion flavor. They produce purple-pink globe flowers in spring and early summer. Common chives are the most cold-tolerant variety and the best choice for beginners. They thrive in 4–6 hours of direct sun and tolerate east-facing windows that would be marginal for basil or cilantro.
Garlic chives (Allium tuberosum) have flat, grass-like leaves and a distinct mild garlic flavor. They are taller than common chives (up to 18 inches), produce white star-shaped flowers in late summer, and are used extensively in Asian cooking — stir-fries, dumplings, noodle dishes. Garlic chives prefer slightly more light than common chives: a south-facing window or 14 hours of grow light for best production. Their flavor is considerably different from common chives, so if you cook frequently with garlic, they are worth growing alongside the standard variety.
Starting method: Transplants from a garden center are the fastest path — available in spring and early summer, they produce harvestable leaves within 2–3 weeks. From seed, chives germinate in 10–14 days at 65–70°F but take 8–10 weeks to reach harvest size. From grocery store chive clumps with roots attached: plant them directly in soil and they establish successfully within 2–3 weeks if roots are intact.
Step 2: Choose the right container
Chives grow from small bulbs that divide and multiply over time. A clump that starts as 10–15 individual bulbs can grow to 30–50 bulbs within a year. This growth pattern makes container choice important.
Container size: A 6-inch pot is the minimum for a starter transplant. An 8-inch pot allows for 12–18 months of growth before division becomes necessary. If you plan to let the clump grow large before dividing, a 10-inch pot provides the most flexibility. Depth matters as much as diameter — choose a pot at least 6 inches deep to accommodate the bulb cluster and its root system.
Material: Terracotta is the best choice for indoor chives. The porous clay walls allow excess moisture to evaporate from the sides rather than pooling at the root zone, which significantly reduces the risk of bulb rot — the most common cause of indoor chive failure. Plastic pots retain moisture longer and are more prone to causing wet, oxygen-depleted root conditions if you water even slightly too frequently.
Drainage is essential: Every chive pot must have drainage holes. Unlike mint, which recovers quickly from brief over-saturation, chives have small bulbs that begin to rot within a few days of continuous waterlogging. A saucer under the pot is helpful, but empty it 30 minutes after each watering session.
Best for indoor chive and herb growing where drainage and root health matter most
Terracotta Herb Pots 6-Inch with Drainage Holes
Classic unglazed terracotta provides the moisture regulation that chives prefer — excess water evaporates through the porous clay rather than pooling around the bulb cluster. A set of pots lets you grow common and garlic chives side-by-side, or keep a divided clump in a fresh pot ready to replace an established one. The clay also moderates soil temperature, preventing root zone overheating on south-facing winter windowsills.
★★★★★ 4.6 · 9,200 reviews
Check current price on Amazon→Step 3: Soil and planting
Chives are not fussy about soil chemistry, but they are sensitive to drainage. The wrong soil mix is responsible for more indoor chive failures than any other single factor.
Best soil mix: A standard potting mix blended with 20–30% perlite provides the drainage chives need. The perlite keeps the mix from compacting over time and prevents the air-excluding saturation that causes bulb rot. Avoid garden soil, which compacts in containers and drains poorly. Avoid heavy moisture-retaining mixes marketed for tropical houseplants — those hold too much water for chives.
pH: Chives grow well between pH 6.0 and 7.0. Standard potting mix falls within this range, so no amendment is needed.
Planting from transplant: Remove the nursery plug from its container, loosen the outer root mass gently to encourage outward growth, place in the new pot, and fill around the edges with fresh potting mix. The tops of the bulbs should sit just at or slightly below soil level. Water thoroughly and place in your chosen growing location. Do not harvest for 2–3 weeks while the plant establishes.
Planting from seed: Fill a pot with slightly moistened potting mix, scatter seeds across the surface (chives can be sown more densely than most herbs — 15–20 seeds per 6-inch pot produces a full clump), and cover with 1/4 inch of soil. Keep at 65–70°F; germination occurs in 10–14 days. Thin to 2-inch spacing once seedlings reach 3 inches tall, or skip thinning if you want a dense clump.
Step 4: Light requirements
Chives are more tolerant of lower light than most culinary herbs, but they need consistent brightness to produce flavorful, productive growth. Insufficient light leads to pale, thin, slow-growing leaves.
Window placement: An east- or south-facing window providing 4–6 hours of direct sun is ideal. East-facing windows provide bright morning light without the intense afternoon heat that dries small pots quickly. South-facing windows work well in all seasons and produce the most vigorous growth. West-facing windows provide adequate afternoon light but can be hot in summer. North-facing windows typically do not provide enough direct light — chives survive but grow slowly and produce weak, pale leaves.
Under a grow light: A full-spectrum LED running 12–14 hours daily, positioned 6–10 inches above the chive clump, produces results equivalent to a bright east window. Chives require lower light intensities than fruiting plants — a basic 20–30W LED strip is fully adequate for one to three pots. Because chives are compact and do not have the canopy depth of basil or cilantro, even a modest grow light covers the entire plant evenly.
Winter considerations: In northern latitudes, natural light drops significantly from November through February. Chives slow their growth in response and may appear nearly dormant. A grow light on a 12–14 hour timer largely prevents this slowdown and allows continuous winter harvesting. Without supplemental light, water less frequently and stop fertilizing until days lengthen again in late winter.
Step 5: Watering
The correct watering approach for indoor chives is consistent moisture with good drainage — neither continuously wet nor bone dry.
The method: Press a finger 1 inch below the soil surface. Water when that depth feels barely moist to slightly dry. Water thoroughly until water runs freely from the drainage holes, then empty the saucer 30 minutes later.
Frequency: In a 6-inch terracotta pot at typical indoor temperatures (65–72°F), chives need watering every 3–4 days in summer and every 5–7 days in winter. Plastic pots retain moisture longer — add 2 days to these intervals. A pot that feels very light when lifted is likely ready for water. A pot that still feels heavy has adequate moisture in the soil.
Overwatering signs: Yellowing leaves starting from the base, mushy stems near soil level, or a soil surface that remains wet for more than 5 days between waterings all indicate overwatering. This is the most common cause of indoor chive death. Improve drainage by adding perlite and ensure the saucer is emptied after each watering.
Underwatering signs: Limp, drooping leaves that lose their upright stance. Chives tolerate brief dry spells better than basil but sustained drought causes leaf tips to brown and the bulb cluster to shrink. Thorough watering recovers a mildly drought-stressed chive plant within 24 hours.
Step 6: Harvesting correctly
How you harvest chives determines how quickly they regrow. The key principle: always cut at the base, never just trim the tips.
The right technique: Use sharp scissors to snip leaves to 2 inches above soil level. New growth emerges from the base of the leaves and from new shoots developing from the bulbs — not from the tips of existing leaves. Trimming just the ends produces leaves with blunt, brown tips that do not regrow and wastes the plant’s energy on maintaining leaf stubs that serve no purpose.
How much to harvest: Take up to one-third of the leaves at one time from a mature clump. For a 6-inch pot with 20–30 bulbs, that is roughly one full snip around the perimeter, leaving the center to continue growing. Harvest once every 2–3 weeks during spring and summer, and once every 3–4 weeks in winter or lower light conditions.
Flower management: Chives produce attractive purple globe flowers (common chives) or white star-shaped flowers (garlic chives) in spring and summer. The flowers and flower buds are edible — with a mild onion or garlic flavor — and excellent as garnishes in salads or cold dishes. However, once chives begin flowering, leaf production slows as energy shifts toward seed formation. Pinch off flower stems at the base as soon as they appear if continuous leaf production is your priority. Allowing one or two flowers to develop fully is a reasonable compromise; letting the whole clump go to seed significantly reduces harvest yield for several weeks.
Best for harvesting chives cleanly without crushing or tearing the hollow stems
Multi-Blade Herb Scissors for Kitchen Harvesting
Multi-blade scissors cut several chive stems simultaneously with a single snip, making the 2-inch-above-soil harvest technique fast and precise. A clean cut at the right height is the single most important harvesting practice for keeping chives productive — crushing hollow stems with dull blades damages the tissue around the cut and slows regrowth. The shorter blade design also makes it easy to work close to the soil surface without disturbing neighboring stems.
★★★★★ 4.5 · 11,400 reviews
Check current price on Amazon→Step 7: Fertilizing
Chives are light feeders compared to basil or cilantro, but they still benefit from supplemental feeding after the initial potting mix nutrients are depleted.
When to start: Begin fertilizing 4–6 weeks after potting, once the nutrients in fresh potting mix are used up. Feeding too early when the plant is establishing can burn tender roots.
What to use: A balanced liquid fertilizer — 5-5-5 or 10-10-10 — diluted to half the label-recommended strength, applied every 3–4 weeks during active growth (spring through late summer) and monthly or not at all during slower winter months. Heavy nitrogen feeding produces rapid, lush growth but dilutes the essential oils responsible for chive flavor. Steady, moderate feeding with a balanced formula produces better flavor than aggressive nitrogen application.
Organic options: Worm castings worked into the top inch of soil every 3–4 months provide a slow-release nutrient supply that is nearly impossible to over-apply. A light top-dressing of worm castings is the lowest-effort way to maintain chive productivity between liquid feedings.
Step 8: Dividing for long-term production
Dividing is the most important long-term maintenance step for indoor chives, and it is also how you expand from one pot to many at no cost.
When to divide: Every 12–18 months, or whenever growth visibly slows, new shoots appear crowded, or the pot feels light unusually quickly after thorough watering (indicating roots have displaced most of the soil volume). A clump that has been growing for two or more years without division often shows reduced productivity — the individual bulbs compete for resources.
How to divide: Remove the entire clump from its pot. You will find a dense mass of small bulbs connected by roots. Gently separate the clump into sections — each section should have 8–15 individual bulbs and an intact root cluster. Do not try to separate every single bulb; working in groups produces better results than traumatizing each bulb individually. Replant each section into fresh potting mix in a clean pot. Water well and keep out of direct sun for 3–4 days while the divided clumps recover.
What to expect after division: Growth slows for 2–3 weeks while the divided plants reestablish. Resume harvesting once new upright leaf growth is visible. Divided clumps typically outperform undivided crowded ones within 4–6 weeks of recovery.
Troubleshooting common indoor chive problems
Pale yellow leaves, slow growth — insufficient light. Move to a brighter window or lower a grow light to 6–8 inches above the canopy. Yellow chive leaves improve in color within 2–3 weeks of improved light exposure.
Mushy stems near soil level, persistent wet soil — overwatering or poor drainage. Let the soil dry completely, then resume watering less frequently. Add perlite to improve drainage in future potting. If the damage is severe, remove the plant, trim any rotted bulbs away with a clean scissors, and repot in fresh well-draining mix.
Brown leaf tips on otherwise healthy plants — either underwatering, low humidity, or fertilizer salt buildup. Water thoroughly, flush the pot with a full watering (letting water run through freely to flush salts), and check whether the pot is drying out too quickly for your watering schedule.
Thin, sparse, slow-growing clump despite good light — likely root-bound or nutrient-depleted. Check whether roots are emerging from drainage holes; if yes, divide and repot into fresh mix. If not, apply half-strength liquid fertilizer and observe for 3–4 weeks.
Aphids or thrips on leaves — small infestations can be removed by rinsing leaves under a stream of water. More established infestations respond well to insecticidal soap spray: view on Amazon. Chives are naturally somewhat resistant to pests because of their Allium chemistry — heavy infestations are uncommon compared to basil or mint.
No growth in winter — chives are perennials that slow significantly in short-day winter conditions. This is natural. Supplement with a grow light on a 12–14 hour timer to maintain growth, or accept slower production until late winter and reduce watering frequency to match.
FAQ
Frequently asked questions
Can you grow chives indoors year-round?
How long do chives take to grow from seed indoors?
How do I harvest chives so they keep growing?
What is the difference between common chives and garlic chives?
Can I grow chives from the grocery store?
Are chives safe for cats and dogs?
Why do my chives flower so early?
How do I know when to divide my indoor chives?
Bottom line
Chives are the most maintenance-efficient culinary herb you can grow indoors. They tolerate lower light than basil, they do not bolt the way cilantro does, they regrow continuously from the same root system without reseeding, and a single plant divided periodically provides a perpetual supply at essentially zero cost. The learning curve is short: get drainage right, cut at 2 inches above soil (not just the tips), and give the plant at least 4 hours of bright light daily.
Start with a nursery transplant in a 6-inch terracotta pot with well-draining potting mix, place it in your brightest window or under a grow light, and harvest every 2–3 weeks by snipping to 2 inches above soil. Pinch flower buds as they appear to maintain leaf production. Divide the clump every 12–18 months to refresh the plant and create new starts. Within a month, you will have a productive chive plant that makes every egg dish, soup, potato, and salad meaningfully better with a 30-second snip before serving.
For more on growing indoor herbs: how to grow herbs indoors for a complete guide to the full range of culinary herbs, how to grow green onions indoors for another Allium that grows quickly from kitchen scraps, how to grow garlic indoors for growing the related bulb for greens and full heads, and herbs for indoor garden to compare chives with other herbs and decide what to grow based on your light and space.