guides
How to Grow Garlic Indoors: Greens & Bulbs
Grow garlic greens in 2 weeks or full bulbs in a pot indoors. Step-by-step guide covering soil, light, containers, and harvesting.
 Priya Anand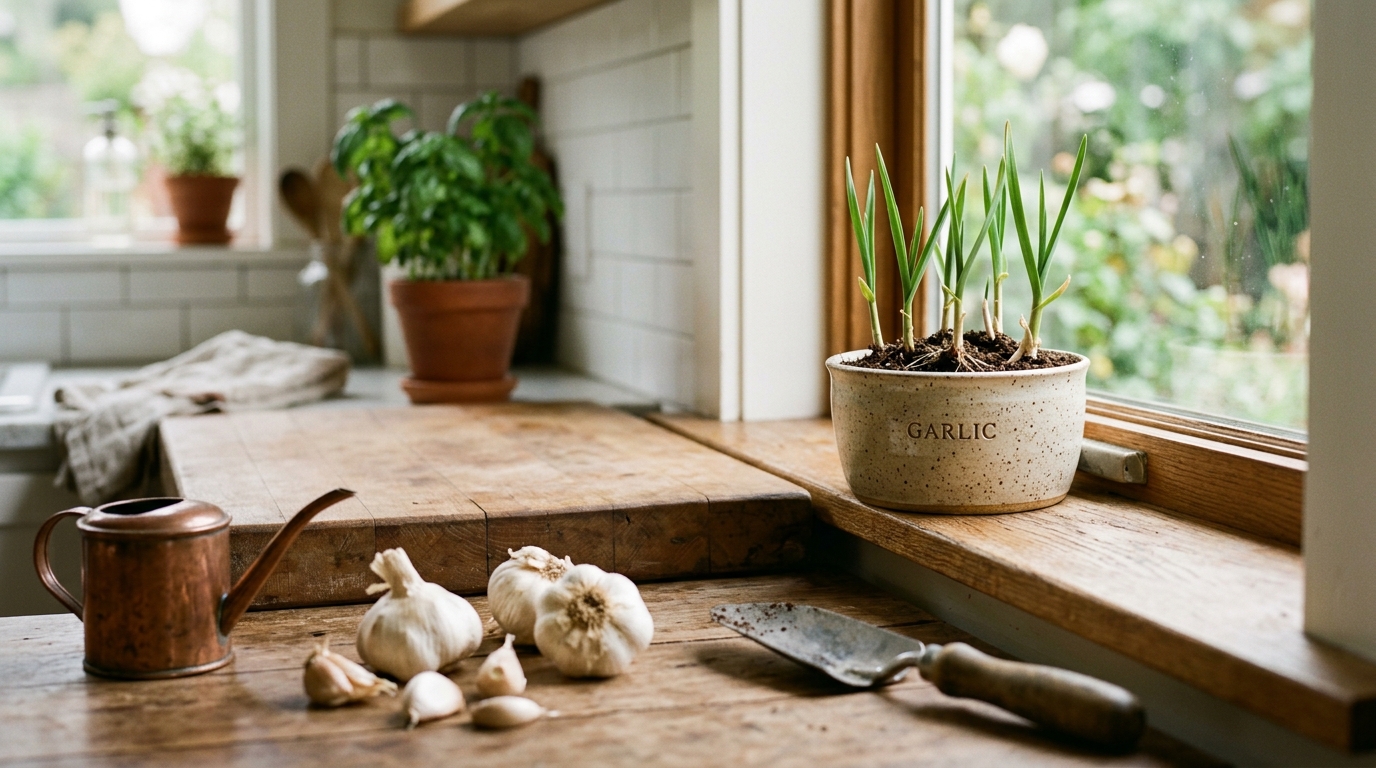
Growing garlic indoors is split into two goals: for garlic greens (scallion-like shoots), plant a clove in soil or water and harvest in 2–3 weeks with no special setup. For full garlic bulbs, use a 6-inch deep container, well-draining soil, and 6+ hours of light — expect a 5–9 month growing cycle that includes a cold period of 4–6 weeks.
Most indoor gardeners are better served by growing garlic greens year-round than by chasing full bulbs. The greens carry genuine garlic flavor, grow in almost any window, and regenerate from a single clove multiple times. Full-bulb production is achievable indoors but requires more space, a longer commitment, and a cold-vernalization step that most apartments cannot easily provide. This guide covers both paths so you can choose the right approach for your setup — and get the most out of whichever you pick.
Garlic greens vs. full garlic bulbs: which should you grow?
The answer for most indoor gardeners is garlic greens. Here is why that distinction matters:
Garlic greens are the green shoots that emerge from a clove within 5–10 days of planting. They taste mildly garlicky — similar to chives but with a more pronounced garlic note — and work well as a garnish, in stir-fries, salads, and scrambled eggs. Growing them requires nothing more than a shallow container, basic potting soil, moderate light, and any grocery store garlic clove. One clove produces 2–3 harvests of greens before its energy is spent. A kitchen windowsill with 4–5 hours of sun is sufficient.
Full garlic bulbs indoors are a longer project. Garlic is a biennial that naturally experiences summer, autumn, a cold winter, and spring before bulbing. Indoors, you replicate this by growing the cloves through late summer and fall in a warm room, then moving them to a cold location (a garage, an unheated basement, or a refrigerator drawer set to 35–45°F) for 4–6 weeks to simulate winter dormancy, then returning them to warmth and light to trigger bulbing. The result is a real garlic bulb, typically smaller than store-bought due to container constraints, but genuinely satisfying to harvest.
If you have the patience and the space, growing bulbs is worth attempting. If you want garlic flavor available year-round with minimal effort, grow greens continuously and replenish the cloves every few weeks.
What you need to get started
| Product | Best for | Rating | Notes | |
|---|---|---|---|---|
| Garlic cloves (organic preferred) | Starting both greens and bulb grows | ★★★★★ | Grocery store garlic works for greens but may be treated to suppress sprouting. For bulb growing, use seed garlic from a garden supplier for reliable results. | Check price |
| 6-inch deep terracotta pots with drainage holes | Full bulb growing — garlic roots run 6 inches deep | ★★★★★ | Depth matters more than width for full bulbs. For greens only, a 3-4 inch shallow container is fine. Never use a pot without drainage holes. | Check price |
| Well-draining potting mix | Preventing the root rot that kills garlic quickly | ★★★★★ | Mix standard potting soil 2:1 with perlite or use a cactus-and-herb mix. Avoid moisture-control formulas; garlic hates consistently wet soil. | Check price |
| Full-spectrum LED grow light | Indoor bulb growing without a south-facing window | ★★★★★ | Run 14-16 hours per day. A basic clip-on or T5 strip at $25-40 covers 2-4 pots easily. Garlic greens tolerate lower light than bulb production. | Check price |
| Balanced liquid fertilizer (5-5-5 or 10-10-10) | Feeding garlic every 2-3 weeks after establishment | ★★★★★ | Switch to a low-nitrogen fertilizer (like a 5-10-10 or bloom formula) once bulbs begin to form — excess nitrogen at that stage promotes leaves over bulb size. | Check price |
| Outlet timer for grow light | Automating consistent photoperiod without daily adjustments | ★★★★★ | A consistent 14-16 hour light schedule is more effective than manually switching lights, and costs $10-15 for a basic mechanical timer. | Check price |
Step 1: Choose your garlic variety
Not all garlic behaves the same indoors. The two main types are hardneck and softneck, and the difference matters for indoor growing.
Softneck garlic is the type most commonly sold in grocery stores. It does not produce a stiff central stalk (scape). Softneck varieties require less intense cold vernalization than hardneck types — some varieties will form small bulbs with only 4–6 weeks at 40–50°F. Softneck garlic also stores longer after harvest and is more compact in container settings. Recommended softneck varieties for indoor growing: Artichoke (the standard grocery store type), California Early White, and Inchelium Red.
Hardneck garlic produces a rigid central stalk called a scape before bulbing and requires a more pronounced cold period (often 6–8 weeks at 35–45°F) to trigger proper bulb development. The tradeoff is complex, rich flavor — many gourmet cooks prefer hardneck. Recommended hardneck varieties if you can provide the cold period: Musik, Chesnok Red, and German Red. Hardneck is the right choice if you have an unheated garage or porch that stays between 35–45°F for at least 6 weeks in winter.
For garlic greens, variety matters very little. Grocery store garlic of any type produces greens reliably. Organic garlic is preferred because it is less likely to be treated with sprout inhibitors; look for garlic sold at farmers markets or in the produce section of natural food stores.
Step 2: Prepare your containers
For garlic greens only: Any shallow container 3–4 inches deep with drainage holes works. A standard 4-inch terracotta nursery pot handles one to two cloves. A 6-inch-wide window box holds 6–8 cloves and provides continuous harvests if you plant in staggered batches every 2–3 weeks.
For full garlic bulbs: Depth is the critical factor. Garlic roots reach 6 inches deep, and shallow containers constrain bulb development significantly. Use individual 6-inch deep pots, or a window box or planter at least 6 inches deep. Wider containers allow multiple plants: space cloves 4–6 inches apart in a wider planter.
In either case:
- Drainage holes are non-negotiable. Garlic sitting in waterlogged soil develops basal rot within 1–2 weeks.
- Terracotta is preferred over plastic — it wicks excess moisture and forgives overwatering better than any other material.
- Wash used containers with a 1:10 bleach solution before reuse to avoid introducing fungal pathogens.
Best for growing garlic bulbs indoors in a container with proper depth and drainage
Bloem Terracotta Pots with Drainage Holes
Unglazed terracotta pots are the most reliable container material for garlic. The porous clay wicks moisture from the root zone, reducing the risk of basal rot that plagues garlic grown in plastic or glazed ceramic. A 6-inch depth version gives garlic roots enough room to develop properly. Terracotta also provides ballast — garlic grown tall greens can make lighter plastic pots tip over on a windowsill. Use a saucer underneath but do not let water pool in it.
★★★★★ 4.7 · 8,200 reviews
Check current price on Amazon→Step 3: Plant the garlic cloves
Preparing the cloves:
Break the garlic head into individual cloves just before planting. Do not remove the papery skin — it protects the clove during germination. Choose the largest, firmest cloves from the head; small, soft, or damaged cloves produce weaker plants with lower yield.
Planting depth and orientation:
Plant each clove with the pointed tip facing up and the flat root end facing down. This is the most common beginner mistake when it is reversed — the shoot still emerges, but it takes longer and emerges at an awkward angle. Plant cloves:
- For greens: 1 inch deep, spaced 2 inches apart
- For bulbs: 2–3 inches deep, spaced 4–6 inches apart
Cover with soil and water gently to settle the mix without compacting it. Shoots typically emerge within 5–10 days at room temperature.
Starting for full bulbs:
If growing full bulbs, start cloves in late August through October — mimicking the natural outdoor timing of fall planting. Grow at room temperature through the fall while the plant establishes its root system and builds the leafy top growth that stores energy for bulbing. Then move to cold vernalization (see Step 6) in mid-winter before returning to warmth in late winter or early spring.
Best for starting a full-bulb indoor garlic grow with reliable sprouting cloves
Gourmet Garlic Growers Seed Garlic Sampler
Seed garlic from a reputable supplier outperforms grocery store garlic for bulb growing because it is selected specifically for robust germination, has not been treated with sprout inhibitors, and is often a named variety with known characteristics. Organic hardneck varieties like Musik and softneck types like California Early White both produce well in containers when given the full cold vernalization cycle. Look for firm, large cloves with intact papery skin and no soft spots or mold.
★★★★★ 4.6 · 3,100 reviews
Check current price on Amazon→Step 4: Provide the right light
For garlic greens: Garlic greens tolerate lower light than most herbs. A windowsill with 4–5 hours of indirect or direct sun produces usable greens. East-facing windows work well. Greens grown in lower light will be slightly paler and longer-stemmed, but still flavorful. A grow light is not required for greens-only growing.
For full garlic bulbs: Garlic needs strong light during its active growing phase — 6–8 hours of direct sun from a south-facing window, or a full-spectrum grow light running 14–16 hours per day. Insufficient light during the leaf-building phase results in smaller bulbs at harvest because the plant has not stored enough energy for bulb development.
Signs of insufficient light for bulb production:
- Thin, pale green tops that lean dramatically toward the light source
- Slow leaf emergence with long gaps between new leaves
- Leaves that are noticeably smaller than expected for the variety
For most indoor setups without a south-facing window, a grow light is the practical solution. Position it 6–8 inches above the garlic tops and run it on a timer set to 14 hours on, 10 hours off.
Step 5: Water and fertilize correctly
Watering:
Garlic is more drought-tolerant than most kitchen herbs and more sensitive to overwatering. The correct approach: check the top inch of soil by pressing your finger into the mix. If it feels moist, wait. If it is dry at 1 inch, water thoroughly until water drains from the holes, then let the container drain completely.
In a terracotta pot at room temperature, garlic typically needs watering every 3–5 days during active growth. In winter during vernalization (if kept in a cold space), water only once every 2–3 weeks — garlic in cold dormancy uses very little water, and wet cold soil is the primary cause of basal rot.
Never leave garlic standing in a saucer of water.
Fertilizing:
Garlic is a moderate feeder. Apply a balanced liquid fertilizer (5-5-5 or 10-10-10) at half the recommended strength every 2–3 weeks during the active growing phase (fall and spring). Do not fertilize during cold vernalization or for the first 2 weeks after planting.
For full-bulb growing, switch to a low-nitrogen, higher-potassium formula (such as a tomato fertilizer at 5-10-10 or similar) approximately 4–6 weeks before expected harvest. Excess nitrogen late in the season promotes leaf growth at the expense of bulb sizing.
Best for feeding garlic through bulb development with balanced nutrients and low-nitrogen finish
Dr. Earth Organic Tomato, Vegetable and Herb Fertilizer
Dr. Earth granular fertilizer provides a balanced nutrient profile with added mycorrhizae and beneficial bacteria that support garlic root development in container soil. It is particularly useful for the late-season feeding switch because the lower nitrogen formulation favors root and bulb development over top growth. Apply at the labeled rate to the soil surface and water in — the slow-release granules feed consistently over 2-3 months without salt buildup that can damage garlic roots in small containers. One bag handles a season of herb and vegetable container growing.
★★★★★ 4.8 · 14,200 reviews
Check current price on Amazon→Step 6: Harvest garlic greens or full bulbs
Harvesting garlic greens:
Begin harvesting when shoots reach 6–8 inches tall, typically 2–3 weeks after planting. Snip with scissors at about 1 inch above the soil level, leaving the lower portion of the shoot and the clove intact. The clove will regrow 2–3 times before its energy is exhausted. Once regrowth stops or the new shoots are noticeably thinner and weaker, remove that clove and start fresh.
For continuous greens, plant a new batch of cloves every 2–3 weeks in staggered containers. With 3–4 containers on rotation, you have garlic greens available year-round from a modest windowsill setup.
Harvesting full indoor bulbs:
The harvest cue for full garlic is the same indoors as it is outdoors: the lower leaves turn yellow and dry while the top leaves remain green. For a plant with 8 leaves, expect to harvest when approximately 4–5 of the lower leaves have yellowed. Stop watering 1–2 weeks before planned harvest to begin curing the outer wrapper leaves.
Loosen the soil with a fork or narrow tool and lift the bulb gently — do not pull by the tops. Brush off excess soil without removing the papery wrapper. Set bulbs on a rack or hang in bundles in a warm, well-ventilated spot for 2–4 weeks to cure before storing. Indoor-grown bulbs are often smaller than outdoor-grown ones, but they are fully functional and flavorful.
For full-bulb production, the vernalization step:
After fall planting and 10–12 weeks of room-temperature growth, move the potted garlic to a cold location for 4–6 weeks. A garage, unheated basement, or enclosed porch at 35–50°F works well. A produce refrigerator drawer set to 40°F also works if you have space. Water sparingly — just enough to keep the roots from desiccating completely. After the cold period, return the pots to warmth and strong light. New top growth will appear within 2–3 weeks, followed by bulbing over the next 2–4 months.
Troubleshooting common indoor garlic problems
Yellowing leaves during active growth — most often caused by overwatering. Check soil moisture and reduce watering frequency. In the early weeks before harvest, some lower leaf yellowing is normal and signals the plant is putting energy into bulb development.
Soft or rotting cloves at the base — basal rot, caused by a combination of excess moisture and fungal pathogens. It is the most common reason indoor garlic fails. Prevention: always use sterile potting mix, containers with drainage holes, and avoid watering from above when soil is already moist.
Slow or no sprouting — cloves may have been treated with sprout inhibitors. If grocery store garlic does not sprout within 14 days, source untreated organic garlic. Alternatively, try soaking the cloves in room-temperature water for 12 hours before planting to encourage faster germination.
Thin, lanky tops without much leaf area — insufficient light. Move to a stronger window exposure or supplement with a grow light running 14–16 hours. Garlic that does not build substantial top growth will not have the stored energy to form a meaningful bulb.
No bulbing after the cold period — usually caused by an insufficient vernalization duration or temperatures that were too warm. True garlic vernalization requires 4–8 weeks at 35–50°F. Temperatures above 55°F during this phase may not provide the cold signal needed to trigger bulbing.
FAQ
Frequently asked questions
Can you grow garlic indoors from a grocery store clove?
How long does it take to grow garlic indoors?
Does indoor garlic need full sun?
Why is my indoor garlic turning yellow?
Can garlic grow indoors without soil?
What is the best variety of garlic to grow in a container?
How many garlic greens does one clove produce?
Bottom line
Growing garlic indoors is one of the most accessible food-gardening projects available, especially for greens. A grocery store clove, a 4-inch pot, basic potting soil, and a modest window are all you need to have fresh garlic shoots on the kitchen counter within two weeks. For full bulbs, the commitment is longer but the payoff is genuine homegrown garlic from a container — achievable in most setups with a grow light and a cold vernalization period.
Start with greens to build familiarity with how garlic grows, then attempt full bulbs if the project appeals. Use softneck varieties for the most forgiving indoor bulb experience, plant in terracotta pots with well-draining soil, and avoid overwatering at every stage — that single habit prevents the root rot that ends most indoor garlic attempts before they get interesting.
For more indoor food gardening: how to grow herbs indoors for a full guide to culinary herbs that thrive in the same conditions as garlic greens, how to grow green onions indoors for another easy water-growing crop that works alongside garlic, how to fertilize indoor plants for the full feeding guide for container edibles, and best grow lights for recommendations when window light is not enough for full bulb production.