guides
How to Grow Thyme Indoors: Complete Growing Guide
Grow thyme indoors with 6+ hours of sun or a grow light, fast-draining soil, and minimal watering. Step-by-step guide for year-round fresh thyme.
 Priya Anand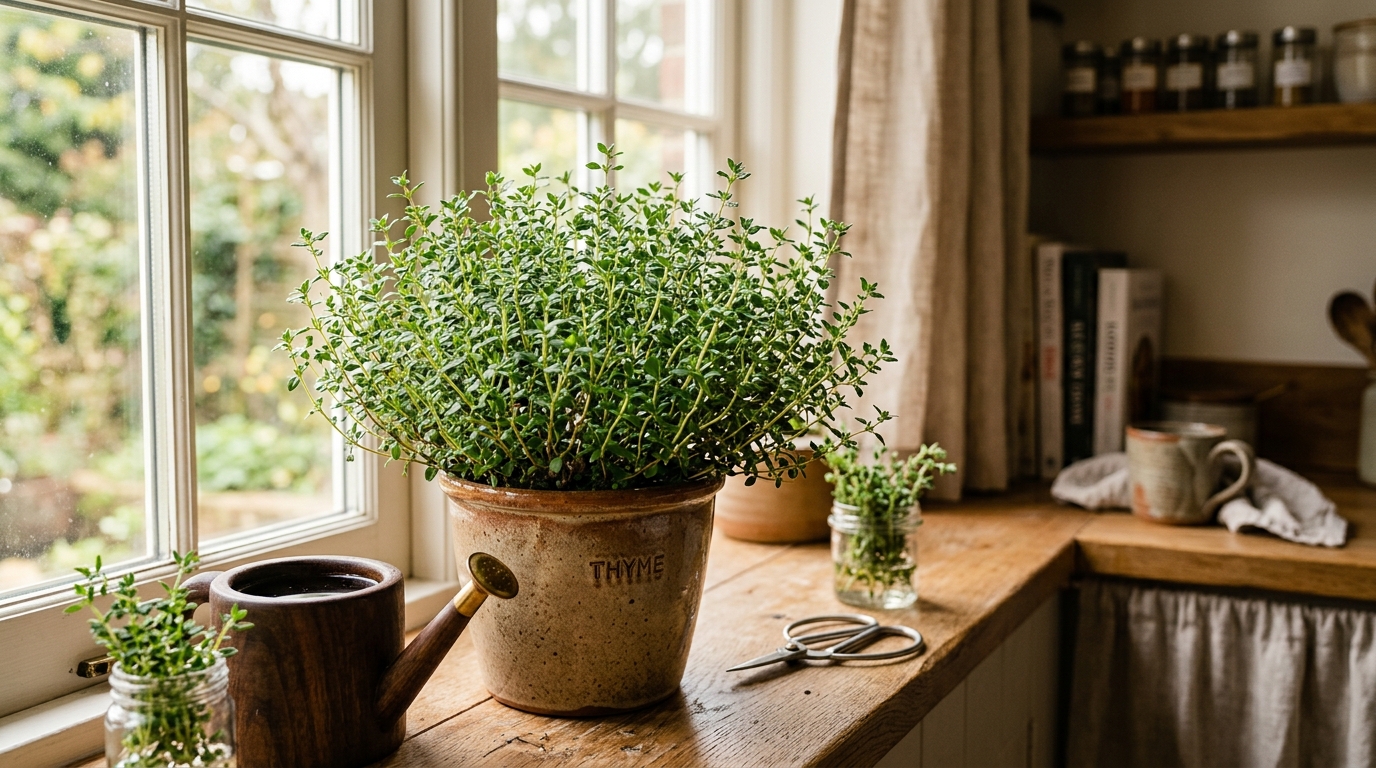
Thyme grows best indoors in a 4–6 inch terracotta pot filled with fast-draining soil and placed in your sunniest south-facing window — at least 6 hours of direct sun daily — or under a grow light running 14–16 hours per day. Common English thyme (Thymus vulgaris) is the top culinary choice. Water only when the top 2 inches of soil are bone dry; thyme tolerates drought far better than it tolerates wet roots, and overwatering is the leading cause of failure indoors.
Like oregano and rosemary, thyme is a Mediterranean perennial that has evolved in thin, rocky, alkaline soils with long dry summers. Indoors, this heritage translates to a herb that practically takes care of itself — as long as you resist the urge to water frequently and provide plenty of light. Get those two basics right and a single thyme plant provides years of harvests, thriving through winter in a pot on your counter or under a grow light without replanting.
Is growing thyme indoors worth it?
Thyme is one of the most rewarding herbs to grow indoors, and one of the most underappreciated. A single plant from a garden center or hardware store herb section costs $3–5 and, once established, provides continuous harvests for 3–5 years as a container plant. Unlike annual herbs such as basil or cilantro that need annual replanting, thyme is a perennial that just keeps growing.
The flavor case is clear. Fresh thyme bears little resemblance to the dried herb from a grocery store spice jar. The volatile thymol oils responsible for thyme’s characteristic pungency degrade rapidly in dried form — commercial dried thyme often sits in packaging for 12–18 months before reaching a kitchen shelf. Fresh-picked thyme, by contrast, is intensely aromatic, bright, and earthy in a way that transforms roasted chicken, braised meats, soups, and roasted vegetables.
Thyme is also genuinely tough. It handles dry indoor air, tolerates temperature variation from 60–80°F, recovers quickly from underwatering, and needs minimal fertilizer. For anyone who has killed fussier herbs like basil or cilantro, thyme is a confidence-rebuilding plant — drought-tolerant, long-lived, and surprisingly resilient once its one non-negotiable requirements (light and drainage) are met.
What you need to grow thyme indoors
| Product | Best for | Rating | Notes | |
|---|---|---|---|---|
| Terracotta pot 4-6 inch with drainage hole | Wicking excess moisture out of the soil to protect thyme roots | ★★★★★ | Terracotta is the ideal pot material for thyme because its porous walls actively pull moisture from the soil, preventing the root zone from staying wet. Plastic or glazed ceramic pots hold moisture longer and require more careful watering restraint. A single large drainage hole is better than multiple small holes that clog. | Check price |
| Perlite for soil amendment | Creating the fast-draining soil thyme needs to prevent root rot | ★★★★★ | Mix perlite 50/50 with standard potting soil. Thyme native soils are almost rocky and mineral — the more drainage you build in, the better. Coarse horticultural sand works as an alternative or addition. Never use a peat-heavy mix straight from the bag without amending. | Check price |
| English thyme transplant or seeds | Starting with the strongest culinary thyme variety for cooking | ★★★★★ | A transplant from a garden center or nursery herb section is faster than growing from seed — you can begin harvesting within 2-3 weeks. Seeds germinate in 14-21 days but take 2-3 months to reach harvestable size. Look for Thymus vulgaris on the label; ornamental varieties have less culinary flavor. | Check price |
| Full-spectrum LED grow light | Supplementing winter light or growing thyme in windows with fewer than 6 hours of sun | ★★★★★ | Thyme needs more light than many indoor herbs to produce the aromatic oils that create its flavor. Run a grow light 14-16 hours daily, 4-6 inches above the canopy. Without adequate light, growth is leggy and flavor is bland — light is the single most critical variable for flavor quality. | Check price |
| Outlet timer for grow light | Automating a consistent 14-16 hour light schedule without manual switching | ★★★★★ | A $10-15 mechanical outlet timer removes the need to manually control a grow light. Thyme benefits from a predictable, stable light period — irregular schedules produce uneven, weaker growth. An inexpensive timer is the simplest way to optimize a grow light setup for any herb. | Check price |
| Diluted liquid fertilizer for herbs | Providing light monthly nutrition without excess nitrogen that dilutes flavor | ★★★★★ | Thyme grows in poor, lean soils naturally and does not need heavy feeding. A diluted liquid fertilizer at half or quarter strength once per month during the growing season is sufficient. Too much nitrogen produces lush, flavorless growth — the same over-fertilized effect seen in grocery store herbs. | Check price |
Step 1: Choose the right thyme variety
Several thyme varieties grow well indoors, but they differ meaningfully in flavor, growth habit, and light requirements. Matching the variety to your cooking style and available light ensures you get lasting value from the plant.
Best indoor culinary varieties:
- English thyme (Thymus vulgaris) — the standard culinary thyme. Small, oval gray-green leaves on upright stems with an intensely savory, earthy, resinous flavor. This is what most recipes mean by “thyme.” The most common variety found in grocery stores and nurseries, and the best all-purpose choice for cooking.
- Lemon thyme (Thymus citriodorus) — a natural hybrid with bright citrus notes layered over the standard thyme flavor. Excellent for seafood, poultry, and light Mediterranean dishes. Grows slightly larger than English thyme and tolerates moderate light levels marginally better. The variegated form (yellow-green leaves) is slightly less vigorous but equally flavorful.
- French thyme (Thymus vulgaris) — essentially English thyme by another name; some nurseries label the same plant differently by region. Generally interchangeable with English thyme for cooking.
- Caraway thyme (Thymus herba-barona) — a low-growing creeping variety with a distinct caraway-like flavor useful for lamb and game. Less common but interesting if you want a flavor variant.
- Creeping thyme (Thymus serpyllum) — primarily ornamental with small pink flowers. Edible but with less concentrated flavor than English or lemon thyme. Better for a hanging planter or trailing over a pot edge than for serious cooking use.
For most indoor herb growers, English thyme as a primary plant and lemon thyme as a secondary plant cover all culinary bases. Both grow well in identical conditions, so they can share the same windowsill.
Starting from seed vs. transplant:
Seeds germinate in 14–21 days at 65–75°F soil temperature, but plants take 2–3 months to reach harvestable size. Starting from a nursery transplant is significantly faster and more reliable — a 3-inch transplant from a garden center is typically harvestable within 2–3 weeks of potting. For seeds, start indoors 8–10 weeks before you want to begin harvesting.
Step 2: Pot and soil setup
Thyme shares oregano’s intolerance for wet roots, and the setup approach is identical. The pot choice and soil mix before planting determine how much error margin you have in watering.
Choosing the right pot:
- Select a terracotta pot 4–6 inches wide and at least 4–5 inches deep for a single transplant
- A 6-inch pot accommodates a larger transplant and provides a year or two of growth before repotting is needed
- Terracotta breathes through its walls and actively dries the soil faster than glazed or plastic pots
- Ensure the pot has at least one drainage hole — no drainage means root rot is inevitable
- Do not use deep saucers that hold standing water; empty the saucer 20–30 minutes after watering or use pot feet to elevate the pot above any standing water
Soil mix:
Standard potting soil retains too much moisture for thyme. Amend it before planting:
- Mix 1 part potting soil with 1 part perlite (50/50 ratio) for a minimum
- For even better drainage: 2 parts potting soil + 1 part perlite + 1 part coarse horticultural sand
- Optionally add a small amount of crushed limestone or dolomitic lime — thyme naturally grows in alkaline rocky soils and performs better with a pH of 6.0–8.0, slightly alkaline compared to most herbs
Planting:
Cover the drainage hole with a small piece of mesh to prevent soil loss. Fill the pot, leaving 0.5 inch of headroom below the rim. For a transplant, gently tease the root ball apart, set it at the same depth as in the nursery container, and firm soil around it lightly. Water thoroughly once to settle the roots, then wait 7–10 days before the next watering session.
Best for improving drainage in thyme and other Mediterranean herb containers
Hoffman 10404 Organic Perlite
Perlite is the single most effective soil amendment for growing thyme, oregano, rosemary, and lavender indoors. These Mediterranean herbs evolved in thin, rocky soil and suffer badly in standard potting mixes that hold moisture too long. Hoffman's perlite mixes cleanly without clumping and maintains its structure over months without compressing. A 2-quart bag costs under $10 and amends 4-6 herb pots thoroughly. If your thyme has died from root rot before, switching to a 50/50 potting soil and perlite mix is almost certainly the fix.
★★★★★ 4.7 · 9,800 reviews
Check current price on Amazon→Step 3: Provide the right light
Light is the primary driver of flavor in thyme. The aromatic thymol and carvacrol compounds responsible for thyme’s distinctive character develop in higher concentrations under strong, direct light. A thyme plant in a dim location grows taller and greener but produces far less flavor than the same plant in a bright south-facing window.
Window placement:
A south-facing window providing 6–8 hours of direct sun daily is the best indoor position for thyme in the Northern Hemisphere. East-facing windows (morning sun) and west-facing windows (afternoon sun) can work if they provide at least 5–6 hours of direct light. North-facing windows do not deliver enough light for culinary-quality thyme.
In summer, keep thyme at least 12 inches from south-facing glass to avoid leaf scorch from intense radiant heat. Good airflow around the plant helps in warm conditions.
Using a grow light:
From October through March, even a south-facing window may not provide enough light intensity for strong thyme growth. A grow light solves this reliably:
- Run the light for 14–16 hours per day
- Position it 4–6 inches above the canopy — thyme tolerates being close to grow lights better than many herbs
- A full-spectrum LED panel or T5 fluorescent strip both work well for herbs
The crush test: rub a leaf between your fingers. Strong, immediate fragrance = adequate light. Faint or grassy scent = more light needed.
Step 4: Water thyme correctly
Thyme is the Mediterranean herb most forgiving of underwatering and least forgiving of overwatering. Its native environment — rocky hillsides around the Mediterranean Sea — subjects it to dry summers, periodic drought, and mineral-thin soils that dry rapidly after rain. Indoor thyme should be watered to match this pattern.
Core rule: Water only when the top 2 inches of soil are completely dry. Insert a finger to the second knuckle — the soil should feel dry and crumbly, not cool or faintly moist. In summer this typically means watering every 7–10 days. In winter, the interval extends to 10–14 days as growth slows and the plant uses less water.
How to water:
Pour slowly and thoroughly until water flows from the drainage holes. Then stop and wait for the next dry-down. Empty saucers 20–30 minutes after watering. Never leave thyme sitting in standing water.
Signs of overwatering:
- Yellowing of lower stems and leaves that drop off
- Soft, blackened stems at the soil line (root rot entering the base)
- Soil with a sour odor when disturbed
- Plant wilting despite moist soil
Signs of underwatering:
- Slight wilting of stem tips that perks up quickly after watering
- Leaf color becoming dull or slightly grayish
- Soil pulling away from pot sides
Brief underwatering is recoverable within hours. Root rot from chronic overwatering often requires completely replacing the soil and cutting damaged roots — and sometimes kills the plant entirely. When in doubt, wait another day before watering.
Step 5: Fertilize sparingly
Thyme, like all Mediterranean culinary herbs, produces more concentrated aromatic oils when grown in lean conditions. Rich, heavily fertilized soil encourages vigorous vegetative growth but dilutes the thymol and carvacrol compounds that create flavor — the same effect seen in over-fertilized commercial greenhouse herbs.
Feed lightly: apply a diluted liquid fertilizer at half or quarter strength once per month from spring through early fall. A balanced formula (10-10-10) or an herb-specific fertilizer both work. Do not fertilize in winter when the plant is growing slowly.
Fresh potting mix contains enough nutrients for the first 3–4 months after potting, so newly planted thyme rarely benefits from immediate feeding. Worm castings top-dressed into the soil surface at repotting time provide a slow, gentle nutrient release without triggering excessive growth.
Step 6: Harvest thyme properly
Regular harvesting is the single most important cultural practice for productive indoor thyme. It promotes bushy branching, delays flowering, and keeps the plant producing tender, aromatic new growth rather than woody, tough stems.
How to harvest:
Using clean sharp scissors or pruning snips, trim individual stems back by one-third to one-half their length, always cutting just above a leaf node. The plant regrows vigorously from the nodes directly below each cut. Avoid cutting back into brown, woody stem tissue without any green leaves — this wood rarely regenerates.
For smaller quantities, simply strip individual leaves from stem tips. For larger harvests, cut multiple stem sections 2–3 inches from the growing tip.
How often:
Harvest lightly every 2–3 weeks during active growth. Do not wait until the plant is large before taking the first harvest — harvesting young plants when they are 4–5 inches tall encourages branching from early on and produces a fuller, denser plant long-term.
Managing flowers:
When thyme produces small pink or white flower clusters (typically in late spring or summer even indoors), pinch them off immediately. Flowering signals the plant to shift energy toward seed production, reducing leaf production and flavor. Consistent flower removal extends the active growing life of each plant by months. If you allow a few flowers to develop — they are attractive and edible — cut them before seed development to prevent the plant from going fully to seed.
Drying thyme:
Bundle 6–10 stems with a rubber band and hang them upside down in a warm, dry, well-ventilated room for 1–2 weeks. Home-dried thyme retains far more volatile oil than commercial dried thyme because it is dried quickly from a fresh state rather than stored for extended periods before packaging.
Best for harvesting thyme stems cleanly without crushing or tearing the woody growth
Fiskars Micro-Tip Pruning Snips
Thyme stems are woodier than soft herbs like basil, and kitchen scissors often crush rather than cut them — a clean cut heals faster and reduces disease entry points. Fiskars micro-tip snips slice precisely at any node, and the spring-loaded mechanism makes repetitive trimming comfortable. The small blade head reaches into dense, branching thyme growth without disturbing surrounding stems. One pair costs $12-15 and handles all herb harvesting work for years. Far superior to standard kitchen scissors for any woody-stemmed Mediterranean herb.
★★★★★ 4.8 · 28,500 reviews
Check current price on Amazon→Step 7: Manage dormancy and repotting
Thyme follows a natural seasonal rhythm even indoors. Understanding this cycle prevents unnecessary intervention during slower growth periods.
Winter slowdown:
Thyme reduces growth noticeably from November through February in most indoor environments. This is normal — even under a grow light, the plant responds to seasonal light changes and temperature cues. Reduce watering to every 12–14 days, stop fertilizing, and maintain the grow light schedule. Some lower-leaf yellowing and minor dieback during this period is typical and does not indicate a problem.
In early spring (February or March), growth resumes strongly. Resume a monthly fertilizing schedule and return to standard watering intervals as the plant pushes new shoots.
Repotting:
Thyme grows slowly and can remain in the same 6-inch pot for 2 years or more before needing repotting. Repot when roots emerge from the drainage hole, when the plant becomes unstable and top-heavy, or when soil quality has degraded and drains poorly despite good initial setup. Move up only one pot size at a time — too much extra soil holds moisture that the roots cannot use, increasing root rot risk. Repot in spring when growth is accelerating; spring repotting allows the plant to recover from root disturbance quickly.
Troubleshooting common indoor thyme problems
Leggy, thin stems falling over — almost always a light problem. The plant is elongating in search of more intensity. Increase grow light duration to 16 hours, move the light closer (4 inches from the canopy), or relocate the pot to the brightest window available. Leggy growth can be pruned back hard to 2–3 inches from the base to encourage compact regrowth.
Pale or gray leaves, minimal new growth — also a light problem in most cases, though cold (below 55°F) also causes this response. Check window orientation and light duration. In winter, even south-facing windows may provide insufficient intensity — add a grow light.
Yellow lower leaves dropping — most commonly overwatering or root rot. Let soil dry out fully before watering again. If the base stems feel soft or mushy, inspect the roots: healthy roots are white or tan, rotted roots are brown and soft. If root rot is caught early, remove damaged roots, repot in fresh dry soil mix with 50% perlite, and reduce watering frequency dramatically.
Powdery mildew (white coating on leaves) — a fungal issue promoted by poor air circulation and high humidity. Thyme dislikes stagnant humid air. Improve airflow with a small fan, remove affected leaves, and apply a diluted neem oil spray to the undersides of leaves weekly.
Woody, unproductive stems — older thyme plants develop woody, lignified stems that produce little new growth. This is normal after 2–3 years. Rejuvenate by cutting all stems back to 3–4 inches from the soil in early spring, just above where you can see green growth. The plant regrows strongly from the base over 4–6 weeks.
Spider mites in dry winter air — tiny stippled damage on leaves with fine webbing visible on stems. Increase humidity slightly near the plant, spray forcefully with water to dislodge mites, and apply neem oil solution to the undersides of leaves.
FAQ
Frequently asked questions
Does thyme need full sun indoors?
How often should I water thyme indoors?
Why does my indoor thyme have no flavor?
Can I grow thyme indoors year-round?
What is the difference between English thyme and lemon thyme?
How do I harvest thyme without killing the plant?
Can I grow thyme from cuttings?
Bottom line
Thyme is one of the easiest and most rewarding herbs to grow indoors, provided you nail two fundamentals: strong light (6–8 hours of direct sun or a grow light at 14–16 hours daily) and fast-draining soil watered only when the top 2 inches are completely dry. Meet those conditions and thyme becomes a nearly self-sufficient perennial herb that provides continuous harvests for years without replanting.
Start with a small English thyme transplant in a 4–6 inch terracotta pot filled with a 50/50 mix of potting soil and perlite. Place it in the sunniest window you have or under a grow light. Water every 7–10 days. Harvest by trimming stem tips every 2–3 weeks and pinch flower buds as soon as they appear. The plant will reward you with intensely aromatic leaves that are noticeably more flavorful than any dried thyme from a grocery store spice rack.
For more on growing culinary herbs indoors: how to grow herbs indoors for a complete herb overview, how to grow oregano indoors for a Mediterranean companion herb with identical care requirements, herbs for indoor garden for choosing herbs suited to your space, and best grow lights if your windows do not provide enough direct sun.