guides
How to Grow Mint Indoors
Grow fresh mint indoors all year in pots on a windowsill or under grow lights. Covers spearmint, peppermint, and more with a step-by-step guide.
 Priya Anand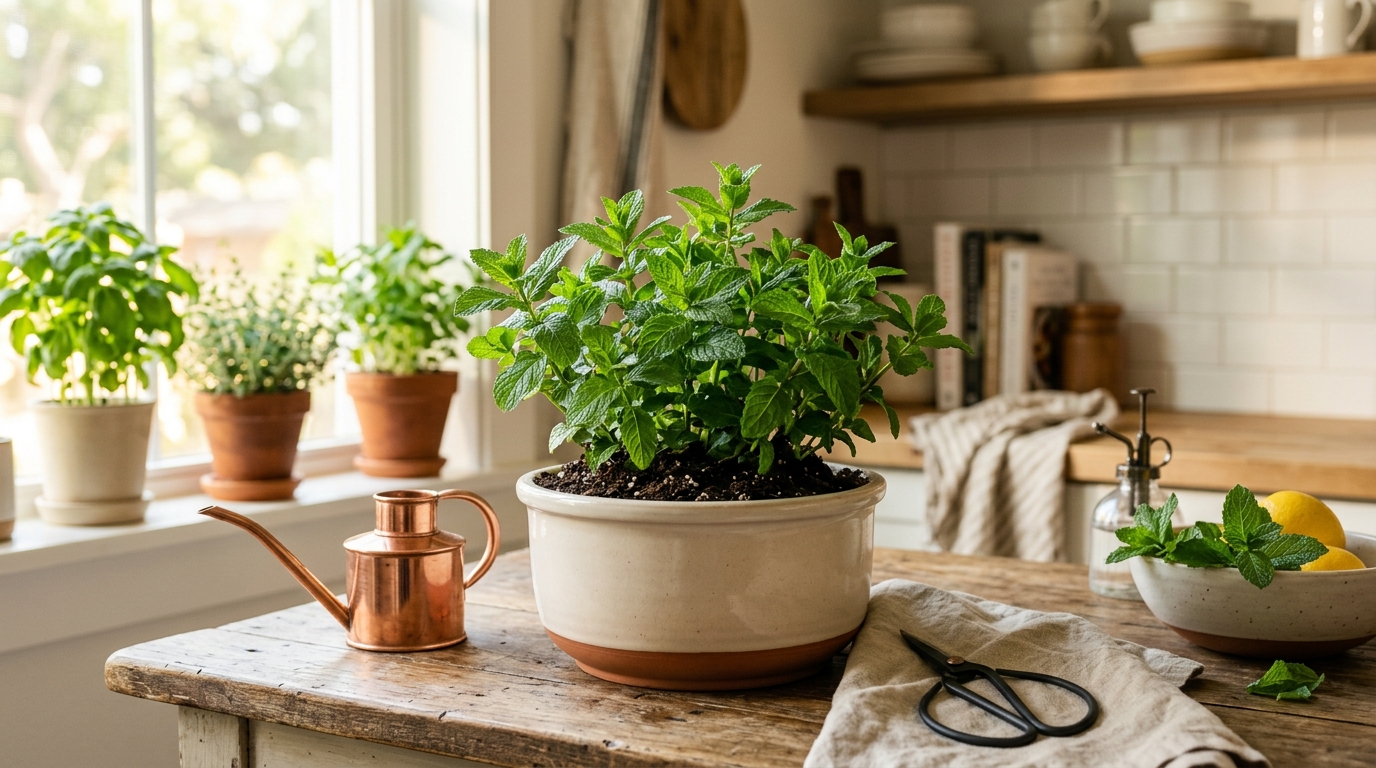
Mint grows best indoors in a bright window with 4–6 hours of direct sun, or under a grow light running 14–16 hours daily, in a 6–8 inch container with good drainage. Spearmint and peppermint are the easiest varieties to start with. Unlike cilantro or basil, mint is a perennial that does not bolt — once established, it provides continuous harvests for months, and the main challenge is preventing it from becoming root-bound rather than bolting too quickly.
Mint is one of the most satisfying herbs to grow indoors because the return on effort is enormous. A single 4-inch starter plant at a garden center costs $3–5 and, with the right conditions, produces far more fresh mint than a household can use in a growing season. A bunch of grocery store mint costs $2–3 and wilts within a week. The economics favor the home grower immediately, and mint’s aggressive growth — which makes it a garden pest when planted outdoors — becomes a strength when channeled into a container.
Is growing mint indoors worth it?
Mint is one of the few herbs where indoor container growing genuinely outperforms buying from the store, both economically and in quality. Fresh mint leaves from a living plant have volatile oils — menthol in peppermint, carvone in spearmint — that begin degrading the moment you cut them. Grocery store mint has typically been harvested 3–7 days before purchase, refrigerated in transit, and is noticeably less aromatic than leaves taken fresh from a living plant.
From a cost perspective, a $3–5 starter plant taken care of properly lasts 1–2 years indoors before needing replacement, producing continuous harvests throughout. A mature plant trimmed regularly can produce 2–4 tablespoons of fresh mint leaves per week — roughly the equivalent of one grocery store bunch purchased weekly at $2–3 each, meaning a single plant pays for itself within one month.
Mint also solves the “leftover herbs” problem. Every recipe that calls for fresh mint uses 1–4 sprigs, leaving most of the bunch unused. Growing your own means harvesting exactly what you need, when you need it, without waste.
What you need to grow mint indoors
| Product | Best for | Rating | Notes | |
|---|---|---|---|---|
| Terracotta herb pot 6-8 inch with drainage | Container mint — breathable walls reduce overwatering risk and root rot | ★★★★★ | Terracotta dries out faster than plastic, giving mint the moisture cycling it prefers. A 6-inch pot suits a single plant for 4-6 months before roots become crowded; an 8-inch pot lasts 8-12 months. | Check price |
| Well-draining herb potting mix | Providing consistent moisture retention without waterlogging roots | ★★★★★ | Standard potting mix blended with 20% perlite works well. Avoid garden soil indoors — it compacts in containers and poor drainage invites root rot. | Check price |
| Full-spectrum LED grow light strip | Growing mint without adequate window light or through winter months | ★★★★★ | Run 14-16 hours daily positioned 4-8 inches above canopy. Mint tolerates lower light than basil but produces small sparse leaves without at least 4 hours of bright light daily. | Check price |
| Outlet timer for grow light | Automating a consistent light schedule without manual switching | ★★★★★ | A basic plug-in timer costs $10-15 and maintains the daily light cycle reliably. Irregular photoperiods stress mint and can trigger premature dormancy in winter. | Check price |
| Liquid herb fertilizer balanced | Sustaining rapid mint growth in a nutrient-limited container environment | ★★★★★ | A balanced 10-10-10 or 5-5-5 liquid fertilizer at half strength every 2-3 weeks keeps mint actively growing. Heavy feeding produces large but flavorless leaves — use a light touch. | Check price |
| Spray bottle for seedlings and cuttings | Misting stem cuttings during the rooting phase to maintain humidity | ★★★★☆ | Useful if you propagate from cuttings. Mist cuttings twice daily until roots form. Once the plant is established, use normal watering from the base. | Check price |
Step 1: Choose the right mint variety
Not all mint varieties perform equally in indoor containers. Flavor, growth rate, and size vary considerably across the genus Mentha, and choosing the right one for your intended use makes a significant difference.
Best indoor mint varieties:
- Spearmint (Mentha spicata) — the most reliable indoor mint. Grows vigorously at moderate light levels, has a mild sweet flavor ideal for tea, cocktails, and cooking. Less aggressive than some varieties and stays reasonably compact in a container.
- Peppermint (Mentha × piperita) — hybrid of watermint and spearmint with the strongest menthol flavor. Excellent for tea and tinctures. Grows slightly more slowly than spearmint, making it easier to manage in a limited-space container.
- Chocolate mint — a peppermint variety with subtle chocolate-mint flavor notes and dark stems. Compact growth makes it well suited to 6-inch pots. Excellent in desserts, hot chocolate, and cocktails.
- Corsican mint (Mentha requienii) — very small, low-growing plant with an intense peppermint fragrance. Ideal for small decorative pots and unusual drinks; not suited to heavy culinary harvesting because of its small size.
- Pineapple mint (Mentha suaveolens ‘Variegata’) — variegated white and green leaves with a mild fruity fragrance. Grows well indoors and doubles as an ornamental plant. Flavor is milder than spearmint, best used in fruit salads and cocktails.
Varieties to avoid indoors: Water mint (Mentha aquatica) grows extremely aggressively and needs very high moisture — better suited to water gardens. Pennyroyal (Mentha pulegium) is toxic to pets and should not be grown in homes with cats or dogs.
Step 2: Choose the right container
Mint is shallow-rooted but produces incredibly dense root masses that fill a container faster than almost any other culinary herb. The container you choose determines how often you need to repot and how well the plant grows between repottings.
Container size: A 6-inch pot suits a single mint plant for 4–6 months before roots become visibly crowded. An 8-inch pot lasts 8–12 months. A 10–12 inch pot can support multiple mint varieties simultaneously or maintain a single plant for more than a year without repotting.
Material matters: Terracotta is the best choice for indoor mint. The porous clay walls allow moisture to evaporate from the sides, which creates a drying cycle that mimics mint’s preference for moist but not saturated conditions. It also prevents the root zone from overheating in sunny windows. Plastic pots retain moisture longer, increasing overwatering risk, and can become very hot in direct afternoon sun.
Drainage is non-negotiable: Every mint container must have at least one drainage hole. Mint roots tolerate brief moisture but cannot survive extended saturation. A saucer under the pot is useful for catching drainage, but empty it 30 minutes after each watering — standing water wicks back up and keeps roots permanently wet.
What about dividers for multiple varieties: Growing two mint varieties in the same pot is possible in a 10–12 inch container with a vertical divider, but root competition usually causes one variety to dominate within 3–4 months. Single-variety pots are more predictable.
Best for indoor mint and herb growing where drainage and airflow matter most
Terracotta Herb Pot with Drainage Holes 6-Pack
Classic terracotta clay pots provide the breathable walls that mint thrives in — excess moisture evaporates through the clay rather than pooling at the root zone. A set of six 6-inch pots lets you grow different mint varieties simultaneously or keep a rotation going, repotting one plant while others are at peak production. Clay pots also provide thermal stability, preventing root zone overheating on south-facing windowsills in summer. A linked saucer fits each pot and catches drainage without requiring a separate purchase.
★★★★★ 4.6 · 8,900 reviews
Check current price on Amazon→Step 3: Plant mint correctly
Mint can be started from seed, cuttings, or transplants. Each method has trade-offs in speed and difficulty.
From transplants (recommended for beginners): The fastest path to harvest. Purchase a 4-inch starter plant, remove it from its nursery pot, loosen the outer root mass gently to encourage outward root growth, then place it in a container 2–3 inches larger with fresh potting mix. Water thoroughly and place in your growing location. First harvest is possible within 2–3 weeks.
From stem cuttings (best for propagating what you have): Cut a 4–6 inch stem just below a leaf node. Remove the lower leaves, leaving 2–3 pairs at the top. Place in a glass of water, changing the water every 2 days. Roots emerge in 10–14 days. Once roots are 1–2 inches long, pot into soil. Mist the new cutting twice daily for the first week to reduce transplant stress.
From seed (slowest method): Mint seeds germinate in 10–15 days at 65–75°F but produce small, slow-growing seedlings. Note that many named mint varieties (peppermint, spearmint hybrids) are sterile hybrids that do not come true from seed — seeds sold as “peppermint” produce highly variable plants. For a specific variety, always use transplants or cuttings.
Planting depth: Cover the root ball but do not bury the stem. The point where roots meet stem should sit at or just below soil level. Planting too deep buries the stem and encourages rot at the crown.
Step 4: Provide the right light
Mint is more forgiving of lower light than basil but still requires adequate brightness to produce flavorful, compact growth. Insufficient light produces leggy, pale plants with diluted essential oils and weak flavor.
Window placement: An east- or south-facing window providing 4–6 hours of direct sun is ideal. East-facing windows give bright morning sun without the intense afternoon heat that dries pots quickly. South-facing windows work well in winter when light intensity is lower and pot drying is less of a concern.
North-facing windows rarely provide enough light for productive mint. Plants survive but grow very slowly and produce small, pale leaves. West-facing windows provide adequate afternoon light but can become quite hot in summer.
Under a grow light: A full-spectrum LED running 14–16 hours daily, positioned 4–8 inches above the mint canopy, produces results comparable to a bright south window. For strip lights mounted under a shelf, position the mint pot so the center of the plant sits directly under the light source.
Mint does not require the high light intensities that fruiting plants need — a basic 20–30W LED strip or clip-on grow light is fully adequate for one to three pots of mint. A dedicated grow light also gives you full control over day length, which is especially valuable in winter when natural light drops to 8–10 hours.
Step 5: Water mint correctly
Mint is often described as “thirsty” and it is — but that does not mean it wants to sit in wet soil. The correct watering approach is thorough, infrequent watering that allows the top inch of soil to dry between sessions.
The method: Check soil moisture by pressing a finger 1 inch below the surface. Water when that depth feels barely moist to slightly dry, before the pot feels very lightweight. Water thoroughly until it runs freely from drainage holes. Empty the saucer 30 minutes later.
Watering frequency: In a 6-inch terracotta pot at 68–72°F indoors, mint typically needs watering every 2–3 days in summer and every 3–5 days in winter. Plastic pots retain moisture longer — add 1–2 days to those intervals. A mint plant that is actively wilting is almost certainly underwatered rather than overwatered; mint wilts dramatically when dry but recovers within 20–30 minutes of thorough watering.
Overwatering signs: Yellowing lower leaves, mushy stems near the soil surface, or a soil surface that stays wet for more than 4 days between waterings all indicate overwatering. Improve drainage by adding perlite to the mix and ensure the saucer is emptied after each watering session.
Underwatering signs: Wilted, crisp-edged leaves. Mint wilts quickly in dry soil but does not suffer lasting damage from occasional dry periods the way basil does. Thorough watering recovers a wilted mint plant rapidly.
Best for improving drainage in mint containers to prevent root rot and soggy roots
Perlite Soil Amendment for Herb Containers
Blending 20-30% perlite into standard potting mix creates a fast-draining growing medium that lets mint roots stay evenly moist without the air-excluding saturation that causes crown rot and root fungal disease. Perlite is inert and does not decompose, so drainage benefits last the life of the potting mix. A 2-quart bag is enough to amend 6-8 herb pots and costs under $10. It is the simplest upgrade for anyone who has had herb roots rot in indoor containers.
★★★★★ 4.7 · 14,200 reviews
Check current price on Amazon→Step 6: Harvest mint to keep it productive
Regular harvesting is both the benefit and the maintenance strategy for indoor mint. Harvesting correctly triggers new branching growth, keeps the plant compact, and delays flowering.
How to harvest: Cut stems back to just above a pair of leaves (a leaf node). New growth emerges from the axils at each leaf node below your cut, producing two new stems where one existed. This is why mint becomes bushier with regular harvesting — each cut doubles the growth points.
How much to take: Never remove more than one-third of the plant at one time. For a mature mint plant in an 8-inch pot, one-third is typically 8–15 stems. Harvest once every 7–10 days during peak growing season (spring and summer) and every 14 days in winter or lower light conditions.
Pinch off flower buds immediately: When mint begins flowering — producing small clusters of lavender, pink, or white flowers at stem tips — the plant shifts its energy from leaf production to seed production. Leaf production slows and the essential oil content of the leaves decreases, making harvested mint less flavorful. Pinch off any flower buds as soon as you see them, cutting the entire flowering stem back to a healthy leaf node. This keeps the plant in its more productive vegetative state.
Harvesting vs. pruning: Harvesting takes specific stems for use. Pruning shapes the plant by cutting back very long or leggy stems regardless of whether you need the leaves. Both are important — harvest what you need, then take another pass over the plant looking for any stems that have grown significantly taller than the rest and cut those back as well.
Step 7: Fertilize and maintain long-term
Mint growing in a container is drawing on a finite pool of nutrients in the potting mix. After the first 4–6 weeks, supplemental feeding is necessary to maintain vigorous growth.
Fertilizer type: A balanced liquid fertilizer — 5-5-5 or 10-10-10 — diluted to half the label strength, applied every 2–3 weeks during spring and summer and monthly in winter. Heavy nitrogen feeding produces large, pale leaves with reduced flavor. The goal is steady, moderate growth with dark green, aromatic leaves — not the fastest possible growth rate.
Feeding schedule: Begin feeding 4–6 weeks after potting (when the existing nutrients in the fresh potting mix are depleted). Stop or reduce feeding in late autumn when indoor light levels drop and the plant enters slower growth. Resume in late winter when day length begins increasing.
Organic options: Worm castings worked into the top inch of soil every 3–4 months provide a slow-release nutrient supply that is difficult to over-apply. Fish emulsion at half strength works well for monthly feeding. Both are gentler than synthetic fertilizers and carry lower risk of salt buildup in the container over time.
Step 8: Repot when root-bound
Mint fills a container with dense roots faster than almost any other culinary herb. A root-bound mint plant shows visibly slowed growth, wilts more quickly than expected between waterings, and often shows roots emerging from drainage holes.
When to repot: Once per year is a reasonable schedule for most indoor mint plants. Check for roots emerging from the drainage holes every 2–3 months. If you see a dense root mass at the drainage holes or if the pot feels very lightweight just 24 hours after thorough watering (roots leaving no space for moisture-holding soil), it is time to repot.
How to repot: Choose a pot 2–3 inches larger in diameter than the current container. Fill the new pot with fresh potting mix to the appropriate depth, place the root ball in the center, and fill around the edges with new mix, pressing firmly to eliminate air pockets. Water thoroughly. New growth typically appears within 1–2 weeks of repotting.
Alternatively — divide: Rather than moving into a larger pot, divide the root ball. Remove the entire plant from its pot, use a sharp knife or garden scissors to cut through the root ball, and replant each section into its own pot with fresh mix. This gives you two or three new plants from one overgrown one, at no cost. Division in spring, when growth is most vigorous, produces the fastest recovery.
Troubleshooting common indoor mint problems
Leggy, pale stems reaching toward the light — insufficient light. Mint stretches toward the nearest light source when it cannot get enough intensity. Move to a brighter window or lower a grow light to 4–6 inches above the canopy. Cut back leggy stems to their nearest healthy leaf node to reset the shape.
Yellowing leaves starting from the bottom — normal aging of lower leaves as the plant puts energy into new growth at the top. If yellowing is progressing rapidly upward and accompanied by mushy stems, suspect overwatering. Check drainage and reduce watering frequency.
White powdery coating on leaves — powdery mildew, a fungal disease encouraged by poor air circulation and high humidity. Increase airflow by adding a small fan near the pots. Remove badly affected leaves. Apply a diluted solution of baking soda and water (1 teaspoon per quart) to the remaining foliage as a preventive treatment.
Rust-colored spots on undersides of leaves — mint rust, a fungal disease specific to mint. Remove affected leaves immediately and improve airflow. Mint rust spreads to other plants in close proximity; isolate affected pots while treating. In severe cases, cut the entire plant back to soil level and allow it to regrow.
Spider mites (fine webbing on leaves, stippled appearance) — common in hot, dry indoor conditions. Rinse leaves thoroughly with water, then apply neem oil solution to all leaf surfaces: view on Amazon. Increase humidity near the pots to discourage future infestations.
Mint not growing during winter — mint is a perennial that slows or stops growth in response to shorter days and lower temperatures. This is natural and not a failure. Maintain watering at reduced frequency, cut back fertilizing, and expect vigorous regrowth in late winter when day length increases. A grow light on a 14–16 hour timer can largely prevent winter dormancy if preferred.
FAQ
Frequently asked questions
Can you grow mint indoors year-round?
How much light does mint need indoors?
How often should I water mint indoors?
Does mint spread indoors in a container?
What is the difference between spearmint and peppermint for indoor growing?
Why does my indoor mint taste weak?
Can I grow mint from grocery store cuttings?
Is mint safe for cats and dogs?
Bottom line
Mint is one of the most rewarding indoor herbs you can grow because it rewards regular attention with continuous, abundant harvests. A single starter plant in a 6-inch terracotta pot, placed in a bright window or under a grow light, produces more fresh mint than most households can use — and continues to do so for months without the bolting problem that makes cilantro and basil require constant resowing.
The three principles that matter most: give it adequate light (a bright window or 14–16 hours of LED), water thoroughly but let the top inch dry between sessions, and harvest regularly to keep it bushy rather than leggy. Pinch off flower buds the moment they appear to maintain leaf quality. Repot or divide once a year to reset the root mass and refresh the soil.
Start with a spearmint or peppermint transplant from a garden center — it is faster and more reliable than seed — and within three weeks you will have a productive kitchen herb within reach of your cutting board for tea, mojitos, lamb dishes, fruit salads, and wherever fresh mint makes a dish distinctly better.
For more indoor herb growing: how to grow herbs indoors for a complete guide to growing the full range of culinary herbs, how to grow cilantro indoors for the cool-season herb that pairs beautifully with mint in sauces and salads, herbs for indoor garden for help choosing which herbs suit your space and light conditions, and best indoor herb gardens for countertop hydroponic systems that automate the growing for you.