guides
How to Prevent Root Rot in Hydroponics
Prevent hydroponic root rot with 7 proven steps: keep water below 72°F, run continuous aeration, add beneficial bacteria, and block reservoir light.
 Priya Anand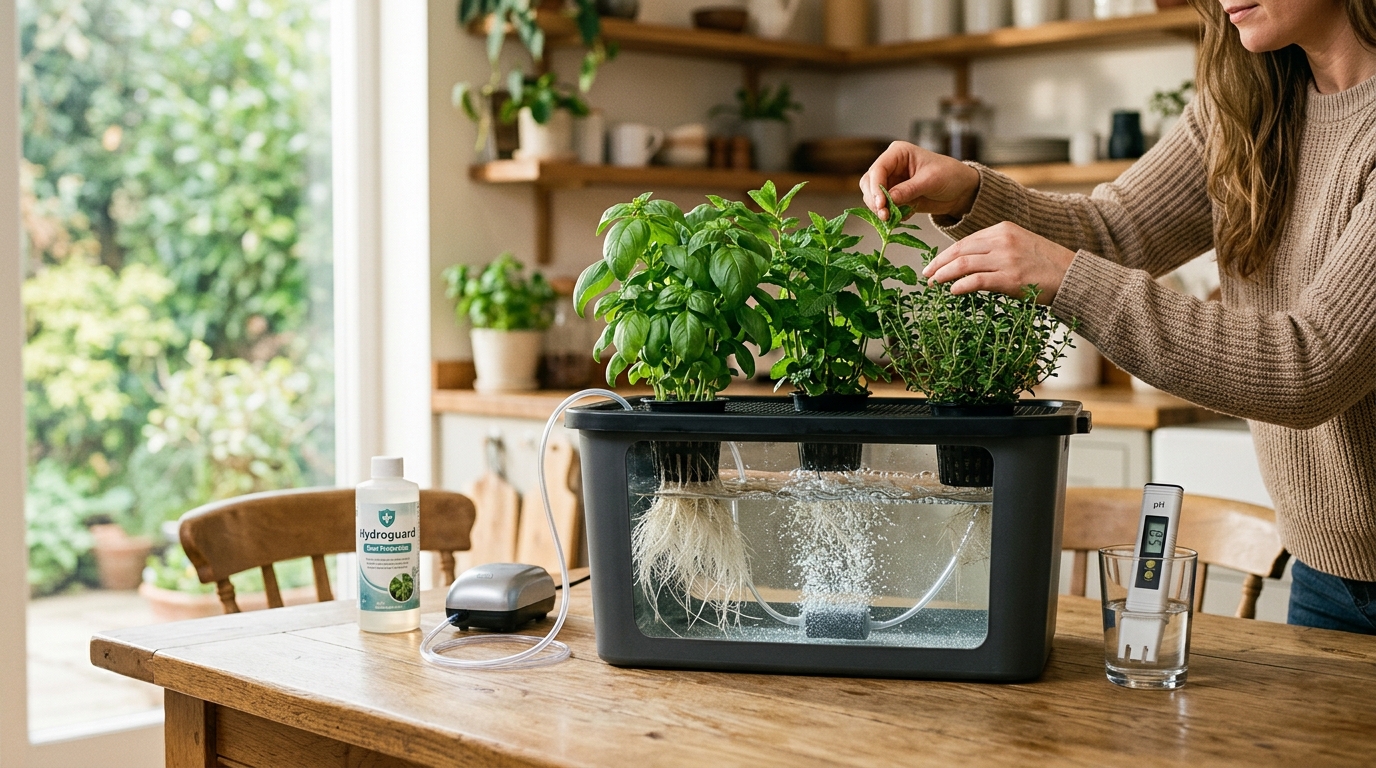
Root rot in hydroponics is caused by Pythium, a water mold that thrives in warm, oxygen-depleted nutrient solution. The fastest prevention is keeping reservoir water below 72°F, running a continuous air pump, adding beneficial bacteria like Botanicare Hydroguard at every reservoir change, and sealing all light from the reservoir — these four measures remove the conditions Pythium needs to establish.
What causes root rot in hydroponic systems?
Root rot in hydroponics is not caused by a true fungus but by Pythium, an oomycete (water mold) that behaves like one in the way it colonizes plant tissue. Pythium species — primarily Pythium ultimum and P. irregulare — are the near-universal cause of the brown, slimy root masses growers encounter in DWC, NFT, and Kratky systems.
Pythium thrives when three conditions align simultaneously:
- Warm nutrient solution — water above 72°F holds significantly less dissolved oxygen and accelerates Pythium reproduction rates dramatically
- Low dissolved oxygen (DO) — Pythium tolerates anaerobic conditions; the beneficial bacteria that compete with it do not
- Light exposure in the reservoir — light enables algae growth, which consumes oxygen and produces organic matter that feeds Pythium
Fix one of these conditions and you slow Pythium significantly. Fix all three and you make root rot nearly impossible in a well-maintained system. Most cases of persistent root rot in home setups trace back to a reservoir that is both warm and under-aerated — two problems that share a single root cause: not enough attention paid to solution environment.
How to identify root rot before it spreads
Catching root rot early gives you a real chance of saving affected plants. Healthy hydroponic roots are white or cream-colored, sometimes developing a light tan surface on portions that have stayed submerged in nutrient solution for extended periods — this surface tanning is normal. Root rot looks and smells completely different:
Signs of root rot:
- Roots are brown, gray, or black throughout, not just at the surface
- Root tissue has a slimy, soft texture rather than firm and springy
- A foul, sulfurous or sewage-like smell from the reservoir when you open the lid
- Plants wilt despite the reservoir being full and pH being correct
- Yellowing leaves that do not respond to nutrient adjustments
- Stunted new growth while lower leaves show stress
If you see these signs, act immediately. In any recirculating system with shared nutrient solution, Pythium spreads from plant to plant within 24 to 48 hours.
Step 1: Keep nutrient solution below 72°F
Water temperature is the single highest-impact variable in root rot prevention. Above 72°F, dissolved oxygen drops sharply and Pythium reproduction accelerates. Below 68°F, both Pythium activity and most bacterial pathogens slow dramatically while plant roots stay healthy and actively absorbing nutrients.
Target range: 65°F to 68°F (18°C to 20°C)
How to keep reservoir temps in range:
- Place your reservoir in the coolest area of your grow space, away from heat sources and HID lighting
- Use an opaque black container — dark reservoirs stay cooler than translucent ones that absorb radiant heat
- Add ice bottles (water frozen in sealed plastic bottles) for temporary cooling without diluting your nutrient solution
- Use a dedicated water chiller for larger systems or warm climates where passive cooling cannot hold temperature
A digital aquarium thermometer left permanently in the reservoir lets you track temperature without opening the lid each time. Check it daily until you have a stable baseline across your lights-on and lights-off cycles.
Best for Growers in warm climates or with large reservoirs who cannot hold temps below 72°F passively
Active Aqua Water Chiller for Hydroponics
Recirculating chiller units connect inline with your reservoir pump and bring solution temperature down to whatever target you set, eliminating guesswork. The 1/10 HP size handles reservoirs up to 40 gallons and runs quietly enough for a home setup. If your reservoir consistently reads above 72°F and ice bottles are not practical long-term, a chiller pays for itself quickly in saved grows.
★★★★★ 4.5 · 312 reviews
Check current price on Amazon→Step 2: Maximize dissolved oxygen with continuous aeration
Dissolved oxygen (DO) is the most direct defense against Pythium. A properly aerated DWC reservoir should maintain DO above 6 mg/L — below this threshold, root health declines and opportunistic pathogens gain a foothold. The solution is straightforward: an air pump and airstone running 24 hours a day, 7 days a week.
Aeration equipment by system size:
| Product | Best for | Rating | Notes | |
|---|---|---|---|---|
| Single-outlet air pump for 1 to 4 gallon reservoirs | Mason jar Kratky setups and small single-plant DWC buckets | ★★★★☆ | A 1 to 2 watt pump with a 2-inch airstone handles reservoirs up to 4 gallons. Run continuously — cycling aeration on a timer is not adequate for maintaining DO at safe levels. | Check price |
| Dual-outlet air pump for 5 to 10 gallon reservoirs | Standard 5-gallon bucket DWC systems — the most common home setup | ★★★★★ | Use a 4 to 6-inch disc airstone for maximum surface coverage in a single bucket. Replace airstones every 3 to 4 months as mineral deposits reduce bubble output. | Check price |
| Multi-outlet air pump for 10+ gallon reservoirs | RDWC systems and shared reservoirs feeding multiple sites | ★★★★★ | For systems with multiple buckets or a reservoir over 10 gallons, use a pump rated at least 2 liters per minute per bucket, with a dedicated airstone in each vessel. | Check price |
| 4 to 6-inch disc airstone | Producing fine, dense bubble curtains in any DWC bucket | ★★★★★ | Larger disc airstones produce smaller, more numerous bubbles and greater surface area contact with the solution, increasing DO transfer efficiency significantly compared to cylindrical stones. | Check price |
Do not put air pumps on timers to save electricity. Root rot can develop within hours in a stagnant, warm reservoir. The electrical cost of running a small air pump continuously is typically less than $3 per month.
Step 3: Add beneficial bacteria to the reservoir
Beneficial bacteria colonize root surfaces and nutrient solution, competing with Pythium for space and resources. Once established, they significantly reduce the likelihood of Pythium gaining a foothold even when temperature or aeration is temporarily imperfect.
Two products dominate home hydroponic use:
Best for DWC, Kratky, and NFT systems as the standard preventive root health treatment
Botanicare Hydroguard Root Inoculant
Hydroguard contains Bacillus amyloliquefaciens, a beneficial bacterium that colonizes root surfaces and produces compounds that suppress Pythium growth. Add 2 ml per gallon at every reservoir change — that is the complete protocol. Compatible with most nutrient lines including General Hydroponics, Advanced Nutrients, and Flora series. The 250 ml bottle treats over 100 gallons of nutrient solution, making per-gallon cost very low.
★★★★★ 4.7 · 1,840 reviews
Check current price on Amazon→Best for Treating active root rot infections alongside standard prevention protocols
Southern AG Garden Friendly Fungicide
Contains Bacillus subtilis and is OMRI-listed for organic use. Works as both a preventive inoculant and a treatment when root rot has already appeared in a reservoir. Use at 1 teaspoon per gallon of nutrient solution. A good secondary option or backup when Hydroguard is unavailable.
★★★★☆ 4.3 · 621 reviews
Check current price on Amazon→Add your beneficial bacteria inoculant at every reservoir change — not just at the start of a grow. Bacterial populations decline over time without replenishment, especially following aggressive pH correction or after H2O2 treatments. Do not use beneficial bacteria and hydrogen peroxide at the same time: H2O2 kills beneficial microbes. Stagger them by 72 hours.
Step 4: Block all light from the reservoir
Light exposure inside a nutrient reservoir triggers algae growth. Algae consume dissolved oxygen and produce organic matter that feeds Pythium — a reservoir with algae growth is primed for root rot regardless of how well you manage temperature and aeration.
How to light-proof a hydroponic reservoir:
- Use opaque black reservoirs or bucket covers. Black HDPE containers block all wavelengths and do not absorb heat the way lighter containers do.
- Wrap any translucent bucket or tote in opaque electrical tape, reflective mylar sleeve covers, or spray-painted exterior coating
- Check every point where tubing, net cups, and airline pass through the lid — these are the most common light leak locations
- Test for light leaks by taking your container into a dark room and holding a flashlight against the outside. Any light visible from inside indicates a gap to seal.
Even brief, intermittent light exposure through a cracked lid or improperly seated net cup is enough to seed an algae bloom in nutrient-rich, warm solution. Many growers discover their root rot problems are solved entirely by properly sealing one persistent light leak they had overlooked for months.
Step 5: Maintain pH between 5.5 and 6.5
Incorrect pH does not directly cause root rot, but pH outside the 5.5 to 6.5 range causes nutrient lockout that weakens root immune response and reduces the ability of beneficial bacteria to establish. Stressed, nutrient-deficient roots are colonized by Pythium far faster than healthy ones.
Check pH daily for the first week of a new grow, then every 2 to 3 days once your system is stable. Use pH Up (potassium hydroxide) and pH Down (phosphoric acid) solutions for adjustment.
Best for Accurate daily pH monitoring in hydroponic nutrient solution
Apera Instruments AI209 pH Pen
Reads pH to 0.01 precision with automatic temperature compensation (ATC) that matters in hydroponic use where solution temperature fluctuates across lights-on and lights-off cycles. The replaceable probe extends meter lifespan indefinitely — budget for a replacement probe every 12 to 18 months rather than buying a new meter. One of the most consistently recommended pH pens in online hydroponic communities.
★★★★★ 4.7 · 2,940 reviews
Check current price on Amazon→Step 6: Follow a strict reservoir change schedule
Even with excellent temperature control, aeration, and beneficial bacteria, nutrient solution accumulates organic debris, dead root tissue, and metabolic waste compounds over time. These organics feed Pythium even in an otherwise clean and well-managed system.
Reservoir change schedule:
- Every 7 to 10 days for active growing systems in warm conditions or when plants are in heavy vegetative growth
- Every 10 to 14 days under cooler conditions or slower growth stages
- Immediately if you observe any discoloration, slime, or foul smell — do not wait for the next scheduled change
Full reservoir change procedure:
- Remove plants and support structures, keeping roots out of direct light during the process
- Discard all old nutrient solution — do not save and reuse
- Rinse the reservoir, pump lines, and airstones with clean pH-neutral water
- Sterilize with a dilute hydrogen peroxide solution — 3 ml of 3% H2O2 per liter of water — and let sit for 30 minutes
- Rinse thoroughly with fresh water after sterilizing to remove all H2O2 residue
- Mix fresh nutrient solution, adjust pH to 5.5 to 6.5
- Wait 72 hours before adding beneficial bacteria inoculant if you used H2O2 during cleaning
- Return plants with any visibly brown root material trimmed back to healthy tissue using sterilized scissors
Skipping the H2O2 sterilization step during a full reservoir change allows Pythium to survive in biofilm on reservoir walls and pump lines, reinfecting fresh solution within 24 hours of restart.
Step 7: Treat active root rot before it spreads
If you catch root rot early — brown coloration affecting less than 30% of the root mass with plants still showing active growth — full recovery is achievable with immediate action.
Emergency root rot treatment protocol:
- Remove plants from the reservoir and inspect roots fully under good light
- Trim all brown and slimy root tissue with clean, sterilized scissors — cut back to visibly healthy white or cream-colored material
- Rinse trimmed roots gently in pH-balanced water (pH 5.8 to 6.0)
- Deep-clean the reservoir using the full Step 6 procedure, including H2O2 sterilization
- Lower solution temperature if above 70°F before returning plants — do not return to a warm system even after cleaning
- H2O2 treatment in fresh solution — add 3 ml of 3% hydrogen peroxide per liter of fresh nutrient solution for the first 48 hours. H2O2 breaks down harmlessly into water and oxygen within this window.
- Add Hydroguard 72 hours after the H2O2 treatment has completed
Severe root rot affecting more than 60% of the root mass combined with whole-plant wilting and yellowing is very difficult to reverse. The faster you intervene, the better the outcome — checking roots weekly is the only reliable early detection method.
FAQ
Frequently asked questions
What does root rot smell like in hydroponics?
Can hydrogen peroxide treat root rot in hydroponics?
Why do my hydroponic roots turn brown even without root rot?
Does Hydroguard actually work for preventing root rot?
How often should I change hydroponic nutrient solution?
Can root rot spread from one plant to another in hydroponics?
Bottom line
Root rot prevention in hydroponics comes down to four non-negotiable habits: keep reservoir water below 72°F, run aeration continuously 24 hours a day, add beneficial bacteria at every reservoir change, and seal every light leak from your containers. Get these four right and root rot becomes a rare event even in systems that are imperfect in other ways.
When root rot does appear, catch it early, trim aggressively, deep-clean the reservoir with H2O2, and return plants to fresh solution at correct temperature. Early-caught root rot is recoverable in most cases — left for a week, the grow is usually lost.
For more on hydroponic growing, see the DIY hydroponics guide, how to start a hydroponic herb garden, hydroponics vs soil comparison, and best hydroponic systems.